
A staple in the homes of the Armenian diaspora. Usually consumed at around Easter, others – like myself – like to enjoy it year-round. Armenian choreg is just a perfect sweet bread.
If you aren’t familiar with Armenian recipes – many recipes come from a long line of Armenian women and often vary slightly from village to village and town to town – choreg is one of them.
I’ve seen many different variations of choreg – some have spices, others have a different order of ingredients, and some top with sesame seeds. My great-grandmother used to make it and placed a few maraschino cherries on top.
This recipe specifically doesn’t include any ground mahleb or ginger – that wasn’t how my family ever made it (and mahleb is hard to come by here) – but you can definitely add a tsp or so to the flour before adding any liquid.
What you will need to make Armenian choreg:
- Flour (all purpose is fine)
- Butter
- Milk
- Sugar
- Yeast
- Eggs
Honestly, this bread is SO simple to make. You can knead the dough by hand or using a stand mixer. If you use a stand mixer, knead using the dough hook on setting 2 or 3 until the dough is smooth and stretchy. It should be roughly under 5 minutes, but some mixers might take longer.
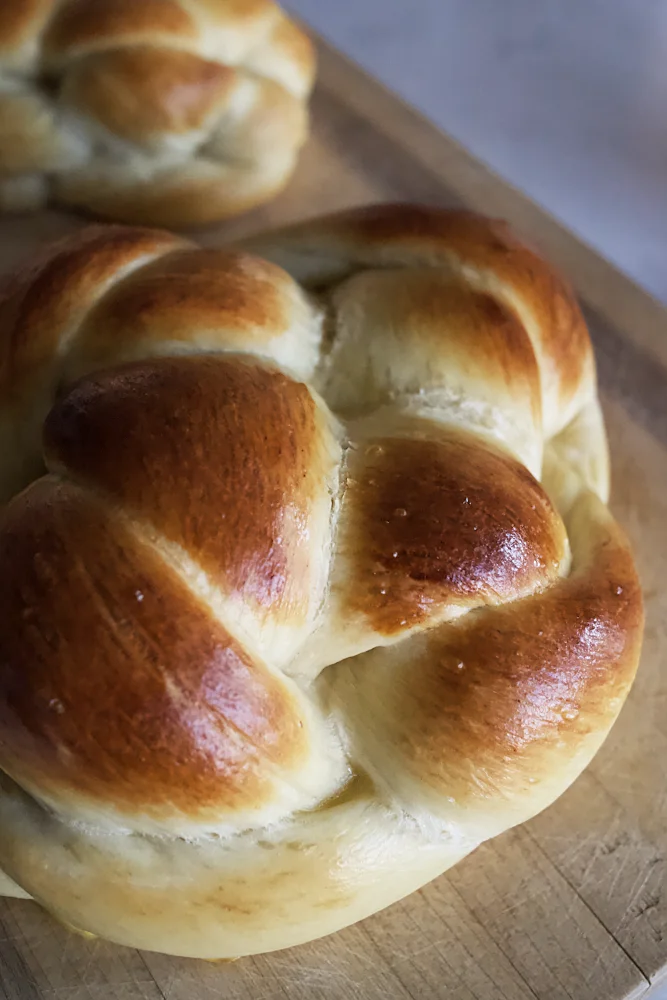
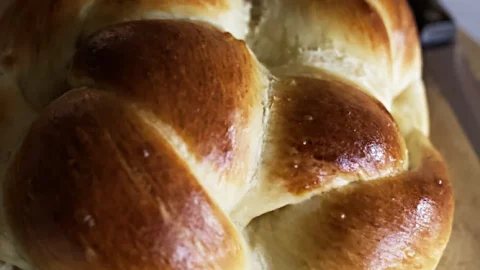
The trick to a golden brown sheen
One thing I always try to emulate when I make choreg is the dark golden brown outside that is shiny. Like the photo above, it just gives it a professional bread making look, am I right?
The best way to achieve this is to brush your bread with a mixture of egg and milk. I make sure I brush each loaf at LEAST once but always try to get two or three brushes in if I can.
Usually, I will brush it straight off the second rise, while my oven is pre-heating. Then again, I will brush all loaves again right before I stick the first batch in the oven. The second batch will get a third brushing right before they do in the oven.
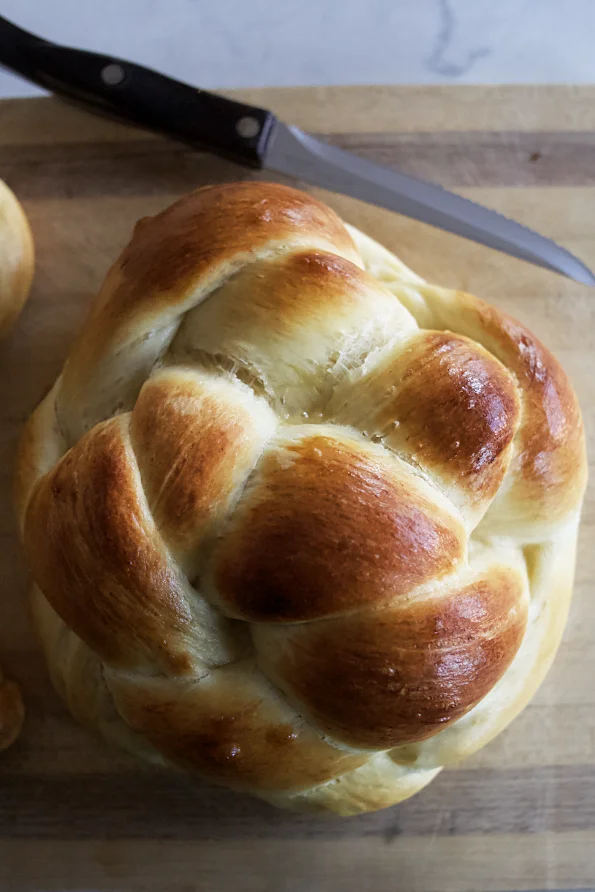
One note I will say, is that this trick does give it a perfect dark golden brown crust but you may need to cover it half way through so it doesn’t burn.
How to tell when your bread is done
The best and the most reliable way to tell when your bread is done is by using a cooking thermometre and sticking into the side and straight into the centre. A bread that uses eggs and milk should have an internal temperature between 190°F and 200°F.
Using internal temperature will ensure that all bread is cooked properly – especially if each loaf is a different weight.
I hope you all enjoy this Armenian choreg recipe – if you like this, make sure to try my garlic bread!
If you’d like a low carb sweet bread – check out my other website The Hungry Elephant.
Armenian Choreg
A perfect sweet bread - this Armenian choreg is a family staple all year round. So simple to make, easy for bread beginners!
Ingredients
BREAD
- 5 cups all purpose flour
- 2 tsp yeast (I used instant yeast)
- 1/2lb (1 cup butter)
- 1 cup milk
- 1/2 cup sugar
- 1 egg
EGG WASH
- 1 egg
- 2 tbsp milk
Instructions
- In a pan over medium heat, melt the butter, along with the milk and sugar. Do not bring to a boil, just heat until the sugar and butter has dissolved. Set aside and let cool until lukewarm.
- In a mixing bowl, add 4 and 1/4 cups of flour. If you are using instant yeast - add it to the flour here. Keep the rest of the flour and add any extra to the dough if you feel it's too wet and not coming together enough. Also save a little for dusting.
- If you are using regular yeast - set aside 1/4 cup of the lukewarm milk butter mixture and add the yeast packet into the 1/4 cup. Wait until it begins to foam and bloom.
- Crack in 1 large egg to the flour and pour in the butter-milk mixture (and the milk & yeast mixture if you have it). It is essential that the butter-milk mix is lukewarm and not hot as you don't want to cook the egg.
- Using the stand mixer and a dough hook, knead for 3-5 minutes or until the dough is very smooth and stretchy.
- If you are kneading by hand, it will take approximately 10 minutes. Feel free to leave it for a minute or so while kneading - this will allow the gluten to form.
- Once the bread is smooth and stretchy - place it into a bowl and rub some olive oil over the top.
- Cover the bowl with seran wrap and a towel.
- Let it rise for 2 hours.
- Once the dough has doubled in size, remove from the bowl.
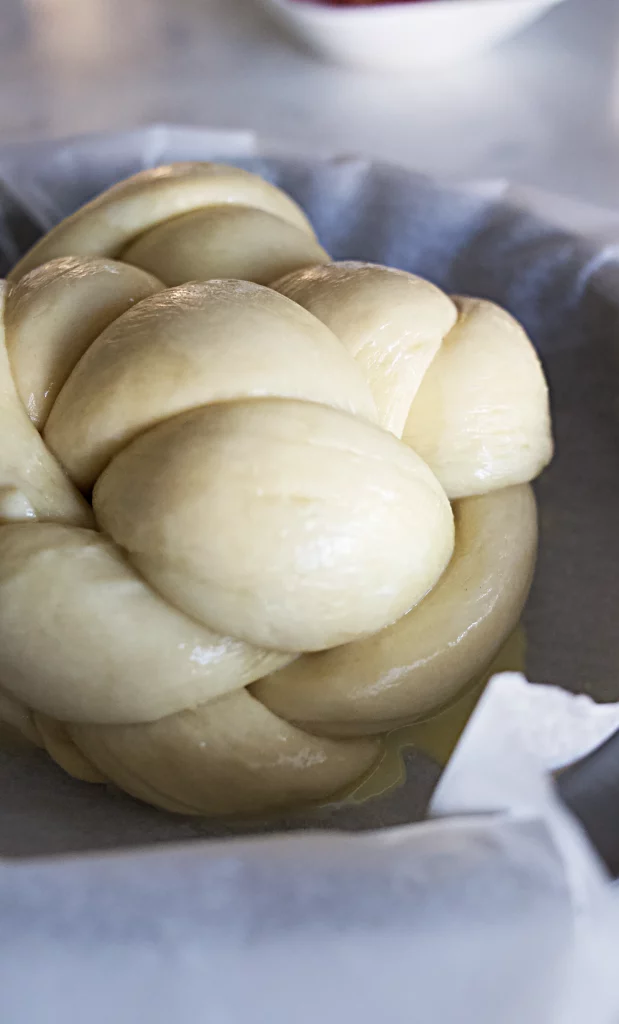
Braiding the Bread traditional style.
- Cut off two sections of dough - one just a little larger than a golf ball and the other just slightly bigger than the first dough ball.
- Use your hands to roll the dough balls into two strings. One should be longer than the other.
- Place the longer string in an upside down U shape and place the smaller string in the middle with the top of the dough touching the upside down U. Pinch them together so they don't fall apart.
- Take the left string and cross it firmly over the middle string. Take the right string and cross it over the middle string (the string that used to be the left one)
- Continue to cross the left and right strings over the centre string firmly until you run out of dough. Tuck the ends underneath.
- Place on a piece of parchment paper.
- Continue to braid the rest of the dough into several braids.
- Cover the dough with more seran wrap and then a towel.
- Rise for 45 minutes to an hour.
- If you want to do a more elaborate braid - like the one pictured in this recipe - here's a simple how-to.
Baking the bread
- After about 45 minutes of the second rise - preheat your oven to 375°F.
- Mix together the egg and milk for the egg wash.
- Brush each loaf generously with the egg wash as the oven preheats.
- Brush again before placing in the first (or only) batch.
- If you have a second batch - brush again before placing in the oven.
- The length of cooking time varies per the size of loaf - if you have made loaves using the golf ball size for the strings as per instructions above - cook for approximately 20 minutes and check interior temperature.
- If you have a loaf that is larger - say 1/2 the total dough, it will need 45-minutes to an hour.. Check frequently and when the top begins to become a dark brown - check the internal temperature. If it needs more time, cover the top with foil so it doesn't burn.